Agency Video Editing Workflow Guide (2026)
Follow a step by step agency video editing workflow from signed brief through picture lock to final client delivery.
 Cardboard TeamUpdated 10 min read
Contents11 sections
- What Does an Agency Video Editing Workflow Look Like?
- How Do You Write a Brief That Cuts Revision Rounds?
- How Do You Organize Footage and B-Roll So a First Cut Is Fast?
- How Do You Run a Remote Video Editing Workflow With Several Editors?
- What Is a Rough Cut, and How Fast Should You Deliver One?
- How Do You Collect Client Feedback Without Email Threads?
- How Do You Hand Off to Premiere Pro or DaVinci Resolve to Finish?
- How Many Revision Rounds Should You Include?
- What Should a Video Editing Workflow Checklist Include?
- How Does Cardboard Fit Into an Agency Video Editing Workflow?
- FAQ
A video editing workflow is the set of stages, from client brief to final delivery, that turns raw footage into an approved video. These stages work the same way across typical agency projects, whether you’re cutting a client testimonial, a 60-second product launch video, or a monthly batch of podcast clips. Settle the message, formats, and final approver first. Carry those decisions through review, picture lock, and delivery.
TLDR:
- Start with a 7-stage video editing workflow, with written sign-offs before moving forward.
- Start with 2 revision rounds: one for the rough cut and one for the fine cut.
- Collect timecoded feedback on one link per version, with one approver and an agreed deadline, such as 48 hours.
- Keep at least 2 footage backups, one off site, and create proxies for heavy 4K or raw files.
- Cardboard AI (cardboard.ai) builds editable rough cuts. You decide which takes stay.
- Timings, fees and round counts here are examples; adjust them to your clients and contracts.
What Does an Agency Video Editing Workflow Look Like?
An agency video editing workflow has seven stages with sign-offs between them. The timings below are an example schedule for a 2-minute testimonial. A 60-second product launch video or a batch of podcast clips follows the same stages with different windows.
- Brief: The producer gets the scope approved on day 1.
- Ingest: The editor checks and organizes the footage on day 1.
- Rough cut: The editor prepares a producer-approved cut over 1 to 2 days.
- Review: The client returns consolidated feedback within 48 hours.
- Revisions: The editor applies notes and the client approves picture lock on day 1.
- Finish: The editor completes sound, color, and titles on the final day.
- Delivery: The producer checks exports and the client confirms receipt on the final day.
Each stage ends with a written approval, and the revision cap is agreed in the brief.
How Do You Write a Brief That Cuts Revision Rounds?
A video editing brief cuts revisions by settling client decisions before you edit. Copy these fields into your video editing workflow template:
- Audience: Name who should watch the video.
- Single message: State what should stick with viewers.
- Target length: Agree on a length within ±10 seconds.
- Aspect ratios: Specify each version you need.
- References: Choose 2 to 3 pacing and style examples.
- Must-include lines: Confirm the exact wording.
- Brand rules: Note any creative requirements.
- Deadline: Set the delivery date.
- Final approver: Name one decision-maker.
For a SaaS client testimonial, the brief could read:
Create a 90-second testimonial for LinkedIn, in 16:9 plus a 9:16 cutdown. The Head of Marketing resolves conflicting feedback.
For a monthly podcast clip retainer, it could read:
Cut 4 vertical clips from each episode, 30 to 60 seconds each, with burned-in captions. Each clip carries one complete idea. The podcast host approves the final picks.
How Do You Organize Footage and B-Roll So a First Cut Is Fast?
Organize your video editing workflow with consistent folders:
01_Brief
02_Footage/A-roll
02_Footage/B-roll
03_Audio
04_Graphics
05_Project
06_Exports
Name working clips ClientCode_ProjectCode_Date_Camera_Take, like ACME_TST01_20261104_CamA_T03. Preserve camera card structures.
- Copy cards with checksum verification so you can confirm every file copied without errors.
- Keep 2 backups, with one off site or in the cloud, in line with CISA’s 3-2-1 backup rule.
- Create lightweight editing proxies when you work with heavy 4K or raw footage.
- When editing remotely, use shared storage or synced proxies, and keep one authoritative project file.
Estimate storage from your recorded footage size and expected duration, then allow space for 2 backups and proxies.
When you hand off B-roll placement, give your assistant editor exact timestamps, for example: “For the 60-second launch video, place the product close-up at 00:42 to 00:47.”
How Do You Run a Remote Video Editing Workflow With Several Editors?
Run a remote video editing workflow by giving each project one owner, one authoritative project file, and one shared folder structure. With 2 or more editors, split work by stage or deliverable so nobody edits the same sequence at once.
- Owner: One editor saves the master project; others work in duplicated sequences.
- Storage: Keep originals on shared cloud storage or a NAS, and sync proxies to each editor.
- Handoffs: Leave a short note with the version name, open issues, and next step.
- Check-ins: Hold a 15-minute sync at each stage change.
For example, a small agency running 3 clients at once, a testimonial, a product launch video, and a podcast clip retainer, gives each client one owning editor and one shared folder using the same folder template. The team holds a 15-minute check-in whenever any project changes stage.
What Is a Rough Cut, and How Fast Should You Deliver One?
A rough cut shapes your video’s story before color, sound, and graphics are polished.
- An assembly cut puts selected footage in sequence.
- A rough cut shapes the message with temporary music.
- A fine cut refines timing and details.
- Picture lock stops changing shot order and timing.
Treat 24 to 48 hours after ingest as an example turnaround for short testimonials, which often means editing a talking head video. Treat 3 to 5 working days as an example turnaround for longer brand videos, and adjust both ranges for your own project. Ask clients to review story, order, and length.
Enter this request in Cardboard for Mac: “Cut this 40-minute client interview into a 90-second testimonial with captions.” You decide which takes stay.
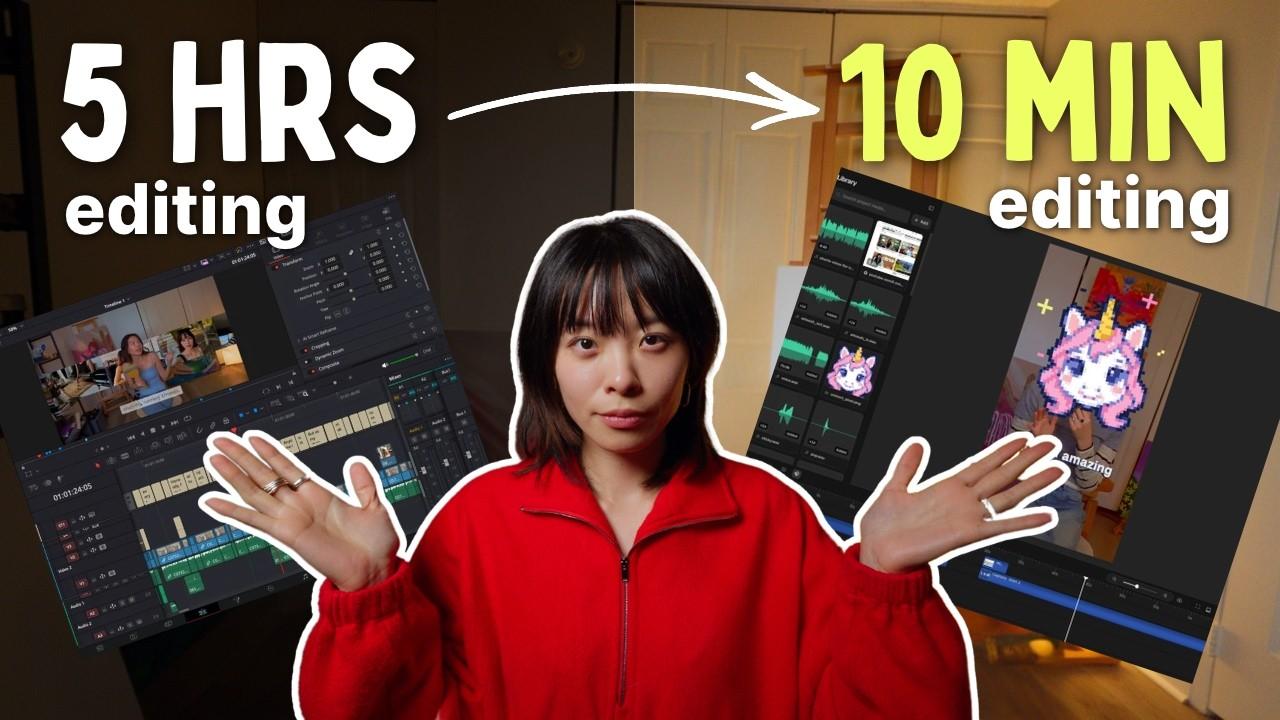
For a real example, watch June Does’ editing video, “How to edit 10x faster in 15 minutes.” Using a script-first approach, she turns about 70 minutes of A-roll into a 50-minute rough cut. It is a creator video featuring Cardboard.
When a testimonial must keep approved quotes, give Cardboard those exact quotes and ask it to keep them intact. Try: “Make a 90-second testimonial from this interview, keeping approved quotes intact and removing pauses elsewhere.” Check each selected quote against the original recording before client review. Use Cardboard for this first cut, then finish sound, color, and titles in your usual editing software.
How Do You Collect Client Feedback Without Email Threads?
Keep client feedback in your video editing workflow on one review link per version, with timecoded comments and an agreed deadline, such as 48 hours. Ask your named approver to submit one consolidated round.
Send clients this checklist:
- Comment on the exact frame so your editor knows exactly where to make each change.
- Keep each comment to one request so your editor can act on it directly.
- Label each note “must fix” or “nice to have” so your editor can prioritize the work.
- Ask the approver to settle any conflicting requests before you start editing.
For testimonial footage, name cuts v01_rough, v02_fine, and v03_lock. Close earlier versions before requesting another review.
Choose a video collaboration tool with no-login viewing, timecoded comments, version history, approval status, and suitable file size limits. If you are weighing Frame.io alternatives, check each tool’s own feature page against this list. Cardboard share links include a no-login watch page and comments pinned to the exact moment, with only a name and email needed, on every plan. Record each approved version separately.
Because a Cardboard review link always shows the latest cut, the link alone is not a fixed approval record. Save a version-named reference export, for example v03_lock, with the approver’s name, approval date, and any agreed exceptions.
How Do You Hand Off to Premiere Pro or DaVinci Resolve to Finish?
For a Cardboard timeline handoff, use the web editor on Starter or above (as of November 2026). Export XML for Premiere Pro or FCPXML for DaVinci Resolve.
Relink full-resolution originals and check the timeline before finishing color, sound, and graphics.
- Keep the original folder structure so you can relink footage.
- Match the sequence frame rate and resolution.
- Flatten unsupported effects where possible; document titles, effects, and speed ramps that need rebuilding.
- Spot-check 3 to 5 edit points against a reference export.
For a 90-second testimonial, for example, you might allow about 2 hours for grading and mixing after the timeline handoff. Adjust that allowance for footage quality and how much finishing the client expects.
If the client asks for a story change after you have moved into Premiere Pro or DaVinci Resolve, pause finishing. Get written approval for the new scope, fee, and deadline, reopen picture lock, and approve the revised story before you resume color and sound work.
How Many Revision Rounds Should You Include?
Start with 2 revision rounds in your agency video editing workflow as a common baseline: one for the rough cut, one for the fine cut. Define each as one consolidated list from the approver.
Sample contract wording: “Includes two revision rounds. Each additional round requires written approval and costs [15%] of the edit fee.” Set your own rate.
For testimonial footage, swapping music is a revision. A reshoot or new core message after rough-cut approval is new scope. Use timecodes and version names to avoid editing the wrong cut.
For a podcast clip retainer, swapping one clip within the month is a revision, while a new episode is new scope.
For a fourth-round request: “These changes require a change order at [15%] of the edit fee. Please approve before we begin.” Set your own rate.
Lock the story before polish. Ask the approver to confirm selected quotes, shot order, and length in writing before you start sound and color. Replacing the opening quote after finishing can mean recutting B-roll, retiming captions, and rebuilding the music transition.
What Should a Video Editing Workflow Checklist Include?
Your video editing workflow checklist needs a clear completion condition for each stage. Copy this template into your project board:
| Stage | Done when |
|---|---|
| Brief | Brief signed |
| Ingest | Footage backed up twice; proxies created |
| Rough cut | Cut sent; first feedback round closed |
| Lock | Picture lock signed |
| Finish | Color, audio and captions checked |
| Export | Required ratios exported: 16:9, 9:16, 1:1 |
| Delivery | Masters and cutdowns sent and archived with names like ACME_TST01_9x16_v04.mp4 |
To speed up editing, learn shortcuts for the trims you make most often and save project templates with reusable presets. Batch similar edits, such as 9:16 testimonial cutdowns or a month of podcast clips, into one session, following patterns from Cardboard’s recipes for common formats.
How Does Cardboard Fit Into an Agency Video Editing Workflow?
Cardboard fits your agency video editing workflow at the rough-cut stage, building editable cuts from your footage. For podcast footage, ask: “Make three vertical podcast clips, each with one complete idea.”
Refine the cut by chat or by hand, collect timecoded client comments, then finish in your editing software when needed.
FAQ
What is the difference between a video editing workflow and a video production workflow?
A video production workflow runs the whole project, from planning and shooting through editing and delivery. A video editing workflow is the post-production part: it starts when footage arrives and ends when the client approves the final export. The brief links the two, because it sets the message and formats before anyone shoots.
What tools does a small agency need for a video editing workflow?
Most small agencies get by with 4 pieces: an editor for the cut, a review tool with timecoded comments, shared storage with 2 backups, and a project board for the stage checklist. Cardboard can handle the first cut and client review links, while finishing stays in Premiere Pro or DaVinci Resolve.
What should you do if the client misses the review deadline?
Send one reminder, then move the delivery date by the same number of days the feedback is late. Write this rule into the brief next to the review window, for example 48 hours, so the schedule change is agreed before the project starts.
Should I use Cardboard or Premiere Pro to start my agency video editing workflow?
Use Cardboard for a prompt-led rough cut when you want a first cut fast from raw footage, or go straight to Premiere Pro if you already know every take and edit point. After picture lock, export from Cardboard’s web editor on Starter or above as XML for Premiere Pro or FCPXML for DaVinci Resolve, then finish color and audio there.
Can I speed up a 4K video editing workflow without upgrading hardware?
Yes. Create lightweight proxies for your 4K or raw files at the ingest stage, edit with those, then relink the full-resolution originals before finishing. If upload time is the bottleneck, Cardboard for Mac processes footage locally on Apple Silicon Macs, so there is nothing to upload first.
Download the free Cardboard for Mac app and start your next client rough cut today. Get started with Cardboard.